 Emerging is the term used to describe moving from a side road into a main road.
The skill of emerging safely draws upon much of what you've learned already - after this lesson you will be able to emerge in several situations without the help of your instructor.
Your actions will vary slightly at different junctions because of the road and traffic conditions but the routines will always be the same.
Approach using your hazard routine
Position for your intended direction
Assess the traffic in the new road
Emerge safely
You 'emerge' every time that you leave a side road to enter or cross another, but the observation, timing and decision making skills that you use when emerging from T-junctions are also relevant in lots of other situations, for example: leaving a garage forecourt, driving out of a car park, moving off your driveway at home and many more places where you will be entering the 'traffic flow'.
Initially, when learning your routines and skills for emerging your instructor will probably be concentrating on emerging to the left at T-junctions on quiet roads. This is because these are the easiest situations without too many distractions.
For more T-Junction Tutorial Videos and videos lessons for lots of other subjects, visit Driving Test Success. (Google Play | App Store - appstore practical videos available as an in app purchase in the 4 in 1 kit)
Your examiner will be looking for the same things at T-junctions as at any other junction; these include a routine approach, good observation and good decision making.
![]() Things that the examiner will consider:
Things that the examiner will consider:
Use of the hazard routine
Good car control (particularly clutch-control in a manual car)
Effective observation
Compliance with signs and road markings
Correct positioning before and after the junction
Take special care where your view is restricted.
If you cause other vehicles to change their speed or direction because you pull out in front of them it will almost certainly be a test fail.
Click/Tap each of the first five signs to find out what they are and the action you should take when you see them.
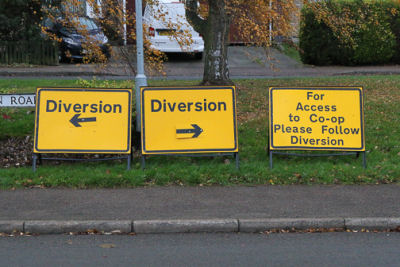
Sometimes signs can be confusing at T-junctions - which way would you go?
When emerging from a side road your view into the road that you are about to enter will determine your speed, and sometimes your position as you come up to the junction.
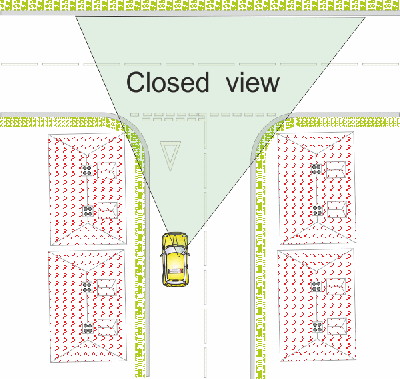
T-Junctions can be loosely classified in two categories - 'open' and 'closed' (diagrams below).
In simple terms, an open junction is one where you have a good view into the road you are entering, before you arrive at the 'mouth' of the junction. These will normally have 'Give Way' markings and/or signs, however, not all Give Way junctions have an open view.
A closed junction is one where your vision is restricted. Extreme examples of closed junctions leave you with no view into the new road, even when you arrive at the junction!
Many closed junctions will have a 'Stop' sign - but there will be some which do not - they might even be unmarked. If there is a Stop line you must stop - this is a legal, as well as a safety requirement (Highway Code Rule 171).
From the information above you will realise that while signs and markings give you valuable information as you approach a T-junction, you can't rely on them completely. You must assess every situation as you approach.
 There is a basic rule which you can apply to road signs and markings in all situations when driving - the rule is 'more paint, more danger!' You could also add 'more signs, more danger.'
At junctions the rules apply as follows:
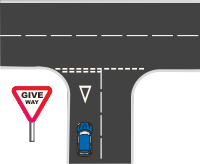
Some junctions simply have Give Way lines, these lines generally indicates that the road you are entering has relatively little traffic. However if there is an additional white triangle painted on the road surface and a Give Way sign, the road is likely to be busier. It's worth noting that some junctions might be incorrectly marked, so this information is a guideline only.
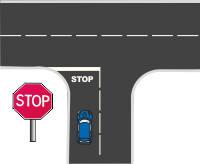
A solid stop line (more paint!) and a Stop sign, with the word STOP painted on the road surface indicates a junction which needs special care. It is illegal not to stop at a Stop Line.
There is an exception to the 'more paint more danger' rule - this is where there is NO paint. If there are no road markings at a junction take particular care.
If the road is clear at a Give Way junction you can carry on without stopping.
'Clear' means that you can pull out without causing another driver, motorcyclist or cyclist to change speed or direction. Also...
It's not only those on wheels that you need to be aware of, you must also look out for pedestrians, especially children, who may be crossing,or about to cross, the road you are entering (Highway Code Rule 170).
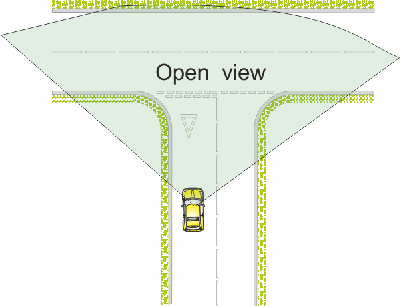
The diagrams below show the difference between an open and closed view. The shaded area shows what you can see from the driver's seat.
As you approach the junction, use the MSM routine.
Check your mirrors and signal as you normally would and then position for your turn.
Often the most useful mirror sequence will be - interior mirror and left door mirror for left turns, interior mirror and right door mirror for right turns.
The most important consideration is that you know what is behind and how it will affect you - this means that you might need all three mirrors or on some occasions, you might start the checks with a door mirror.
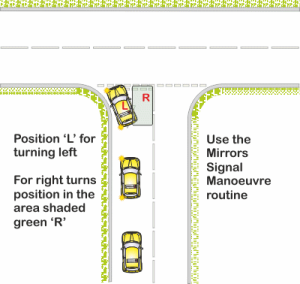
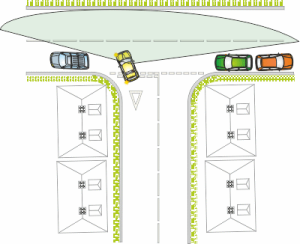
If you are turning left keep to your normal safety line and then position to the left (L on the diagram) keeping a safe distance from the kerb.
If you are turning right take up a position just left of the centre line and remain parallel to the line when you arrive at the junction (R on the diagram).
Start to look into the junction as early as possible on your approach to assess the traffic conditions in the road that you are intending to enter. Your speed will be determined by the type of junction and your 'zone of vision' (what you can see).
If you are approaching a Give Way sign or an unmarked junction, with a good, early, clear view, you might be able to keep moving slowly in second gear, but to do this you need to be 100% certain that the road is clear in all directions at least twenty metres before you arrive at the junction.
If your zone of vision is restricted you will need to go very slowly (using first gear in a manual car).
When approaching a STOP sign you will normally slow down and stop without changing gear.
Change down to first gear after you have stopped; by doing this you will be less likely to move out without stopping fully (which is illegal - and a test fail) and you will have enough time to make sure that it's safe to proceed.
A tip to help with this is to get into the habit of keeping both hands on the steering wheel until the car has come to a complete stop.
One of the most common problems that new drivers have when learning to emerge is approaching too fast and finding that things seem to happen all at once, especially when driving a manual car.
Many new drivers feel that there is not enough time to do everything - if you have felt this way yourself it's OK! It's a natural part of the learning process.
Here's the good news - there's an easy fix to make your approach to junctions feel better!!
The 'not enough time' problem arises when you focus your attention on the 'mouth' of the junction or any white lines leading up to, or at, the junction. When you do this you there will be a tendency to leave everything until the last moment and then struggle to get it all in.
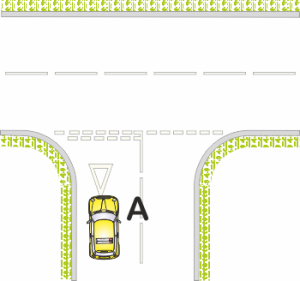
Regardless of the type of car you are driving (manual/auto/electric) the fix is to move your attention (as far as your speed is concerned) back from the junction - about two car lengths back (point A).
Use progressive braking on the approach so that the car feels as though it's going to stop at point 'A'.
As you reach that point you should be going so slow that you need to ease the pressure on the brake pedal (or release it completely) in order to get to the line.
By reducing your speed on approach in this way you will have plenty of time to steer into position and make your final observation checks.
The method above will make most junctions easy to deal with - and in a manual car you will have plenty of time for a 'rolling first gear' if needed.
When you arrive at the junction, look both ways for gaps in the traffic, in the same way as you would when crossing the road on foot.
If the road is clear, or you can see the gap that you are going to take, it will not be necessary to use the handbrake (even at a Stop Line).
If you can't see your gap and have to wait (or if the junction is on a hill), apply the handbrake to keep the car secure while you wait. Note - even if the car that you are learning in has 'brake assist' it's still a good idea to use the handbrake to form a goo habit - not all of the cars you drive in future will have this feature.
In a manual car it's a good idea to select first gear and look to see if the road is clear before pulling on the handbrake, otherwise you might miss a safe gap because you are not ready.
When looking for gaps, concentrate on the car that you will be following, not the car you will be pulling in front of.
Beware of vehicles approaching from your right who are signalling to turn into your road - their signal might have been left on by mistake or they could be lost. This means they might not turn. If you pull out and they don't turn you will be in big trouble!
Sometimes, despite your careful approach you might still be unable to make your decision to carry on, even when you arrive at the junction line.
This could be because of restricted view due to parked cars, trees, pedestrians or any number of other things.
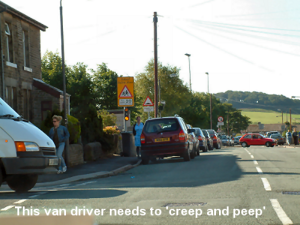
If your view is restricted you will need to 'creep and peep'.
Move out very slowly (using clutch-control in a manual car) until you are in a position where you can see well enough to make your decision.
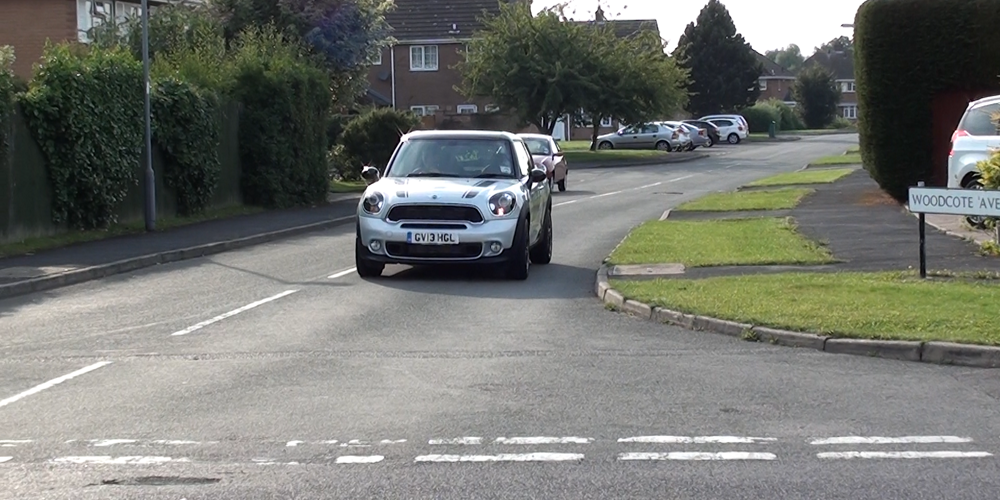
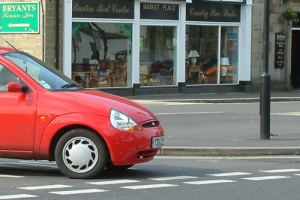
The diagram shows how parked cars can limit the driver's vision - this driver would have to move out at least as far as shown before making a final decision to proceed fully into the main road.
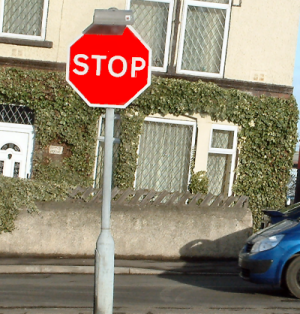
The driver of the white van in the photo above is in a similar position and will have to creep out in order to see around the parked cars.
As mentioned at the start of this section, the use of your emerging skills is not limited to T-junctions, you will need them when emerging from gateways, garages, car parks and many other situations.
And not all junctions are T-junctions!
You will be using the information from this lesson when you approach crossroads, roundabouts and different 'shaped' junctions (for example, Y-junctions).
We'll cover other situations such as roundabouts later, however, it might be worth thinking about a couple of specific things now - positioning when space is restricted and emerging at Y-junctions.
.jpg) Did you know that there are blind drivers on our roads every day? And that you are one of them!
Did you know that there are blind drivers on our roads every day? And that you are one of them!
A typical phrase heard in road-rage ‘conversations' is “Are you blind!? Didn't you see me!”
But unbeknown to many drivers the answers to the questions could be “Yes” (Blind) and "No" (I didn't see you). This is an answer that applies to all human beings and relates to something that could lie at the root of many road fatalities.
Even if you have perfect 20/20 vision it's been estimated that you are ‘blind' for a cumulative period of up to 40 minutes a day – for some people this could be as much as an hour.
This 'blindness is called Saccadic Masking. The effect of Saccadic Masking is that we can fail to see things that are right there in front of us. Luckily there is an observation method that you can use to help to overcome this problem.
The video below was made by Richard Bates, a driving instructor from Wolverhampton, it explains Saccadic Masking and what you need to do to overcome the effect.
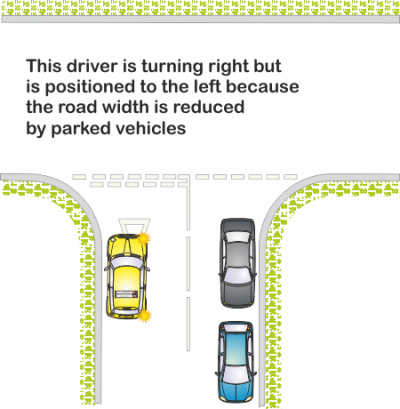
Sometimes you will need to turn right from a narrow road.
The road could be physically narrow, or the road width could be reduced by parked vehicles. In these situations you need to take care when positioning - if you position too far to the right you might obstruct traffic entering your road.
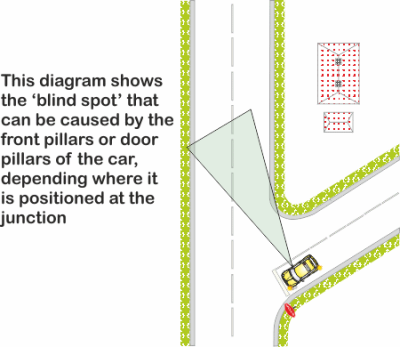
At Y-shaped junctions you will need to take special care because the structure of your car will create extra 'blind-spots' which could obscure your view when waiting and emerging at junctions - especially of cyclists and motor-cyclists.
This problem exists at all junctions but is a particular hazard at Y-shaped junctions or anywhere that you may be entering a road at a similar angle to that shown on the diagram - for example, when leaving a petrol station.
The shaded area on the diagram below gives an example of the extent of the potential blind area in some vehicles.
Click here to complete the quiz for this lesson
 (The page will open in a new window/tab)
You will find references for the answers in this lesson.
You can check your answers as you go along, or complete the full quiz before checking.
Leaving the check to the end is a good way to test yourself.
When you check or review your answers you will get a brief explanation of the answer.
Good Luck!
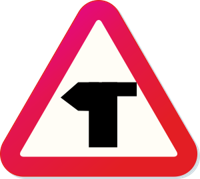
T-Junction

This sign warns you of a T-junction where the main road goes around to the left with a side road entering from the right - the sign can be reversed to show the side road to the left
When you see this sign you will expect other drivers to emerge from the right (or left if reversed), however, although this is a T-Junction you are on the main road and will have priority. But take care, emerging drivers who do not know the area or who are blindly following a sat-nav might think that they are on the main road an pull straight out into your path - if they did this they might be to blame, but you could end up in hospital. Treat all junctions with caution.
When you see a T-junction sign watch out for vehicles that might cut across or swerve into your path as they turn at the junction. There may also be more pedestrian activity.
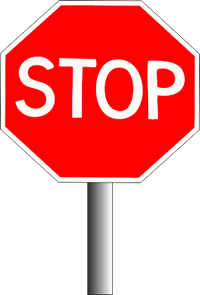
You Must Stop
This is the only octagonal sign - so even if it was covered with snow or painted over with graffiti you would still recognise it.
This shape is used all over the world and always means stop.
You must stop at the 'stop line' when you see this sign - and only proceed when you know that the road that you are entering is clear.
Watch out for vehicles that might cut across or swerve into your path when leaving the main road. There may also be more pedestrian activity.
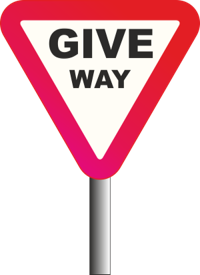
Give Way To Traffic On The Main Road
When you see this sign you must give way to traffic on the road that you are entering. You may proceed without stopping but must not force other drivers to change their speed or
direction - if you are in any doubt, stop.
As with the Stop sign, watch out for vehicles that might cut across or swerve into your path when leaving the main road. There may also be more pedestrian activity.
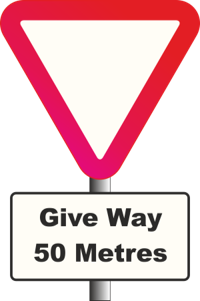
Advance Warning Sign
This sign is placed in advance of Give Way or Stop signs where the junction is concealed or hazardous. The plate indicates the distance and type of junction that you are approaching (in advance of a Stop sign controlled junction this example would say Stop 50 Metres.
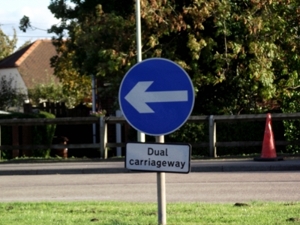
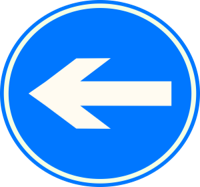
You Must Turn Left
This sign is placed at the location of a 'left turn only' junction. At a T-Junction this would mean 'You must 'turn left now'.
The example in the picture was taken at T-junction where the side road was joining a dual-carriageway, the sign can also be found in one-way systems.
The sign can be reversed, in which case it means - you guessed it - turn right.